Webhook Guide
Webhooks allow Merdeka to push real-time notifications to your system whenever key events occur — such as when a lead is created or a project is updated. Instead of polling for changes, your endpoint receives data automatically.
This guide walks you through setting up and managing webhooks from the Merdeka Backoffice.
Prerequisites
- Access to the Merdeka Backoffice (your credentials will be provided by the Merdeka team)
- A publicly accessible HTTPS endpoint on your side to receive webhook payloads
- A secret value for authenticating incoming requests
Step 1 — Log in to the Backoffice
Navigate to the Merdeka Backoffice and log in with your credentials.
Once logged in, find Webhooks in the left sidebar menu under your dashboard. This will bring you to the Webhook Management page.
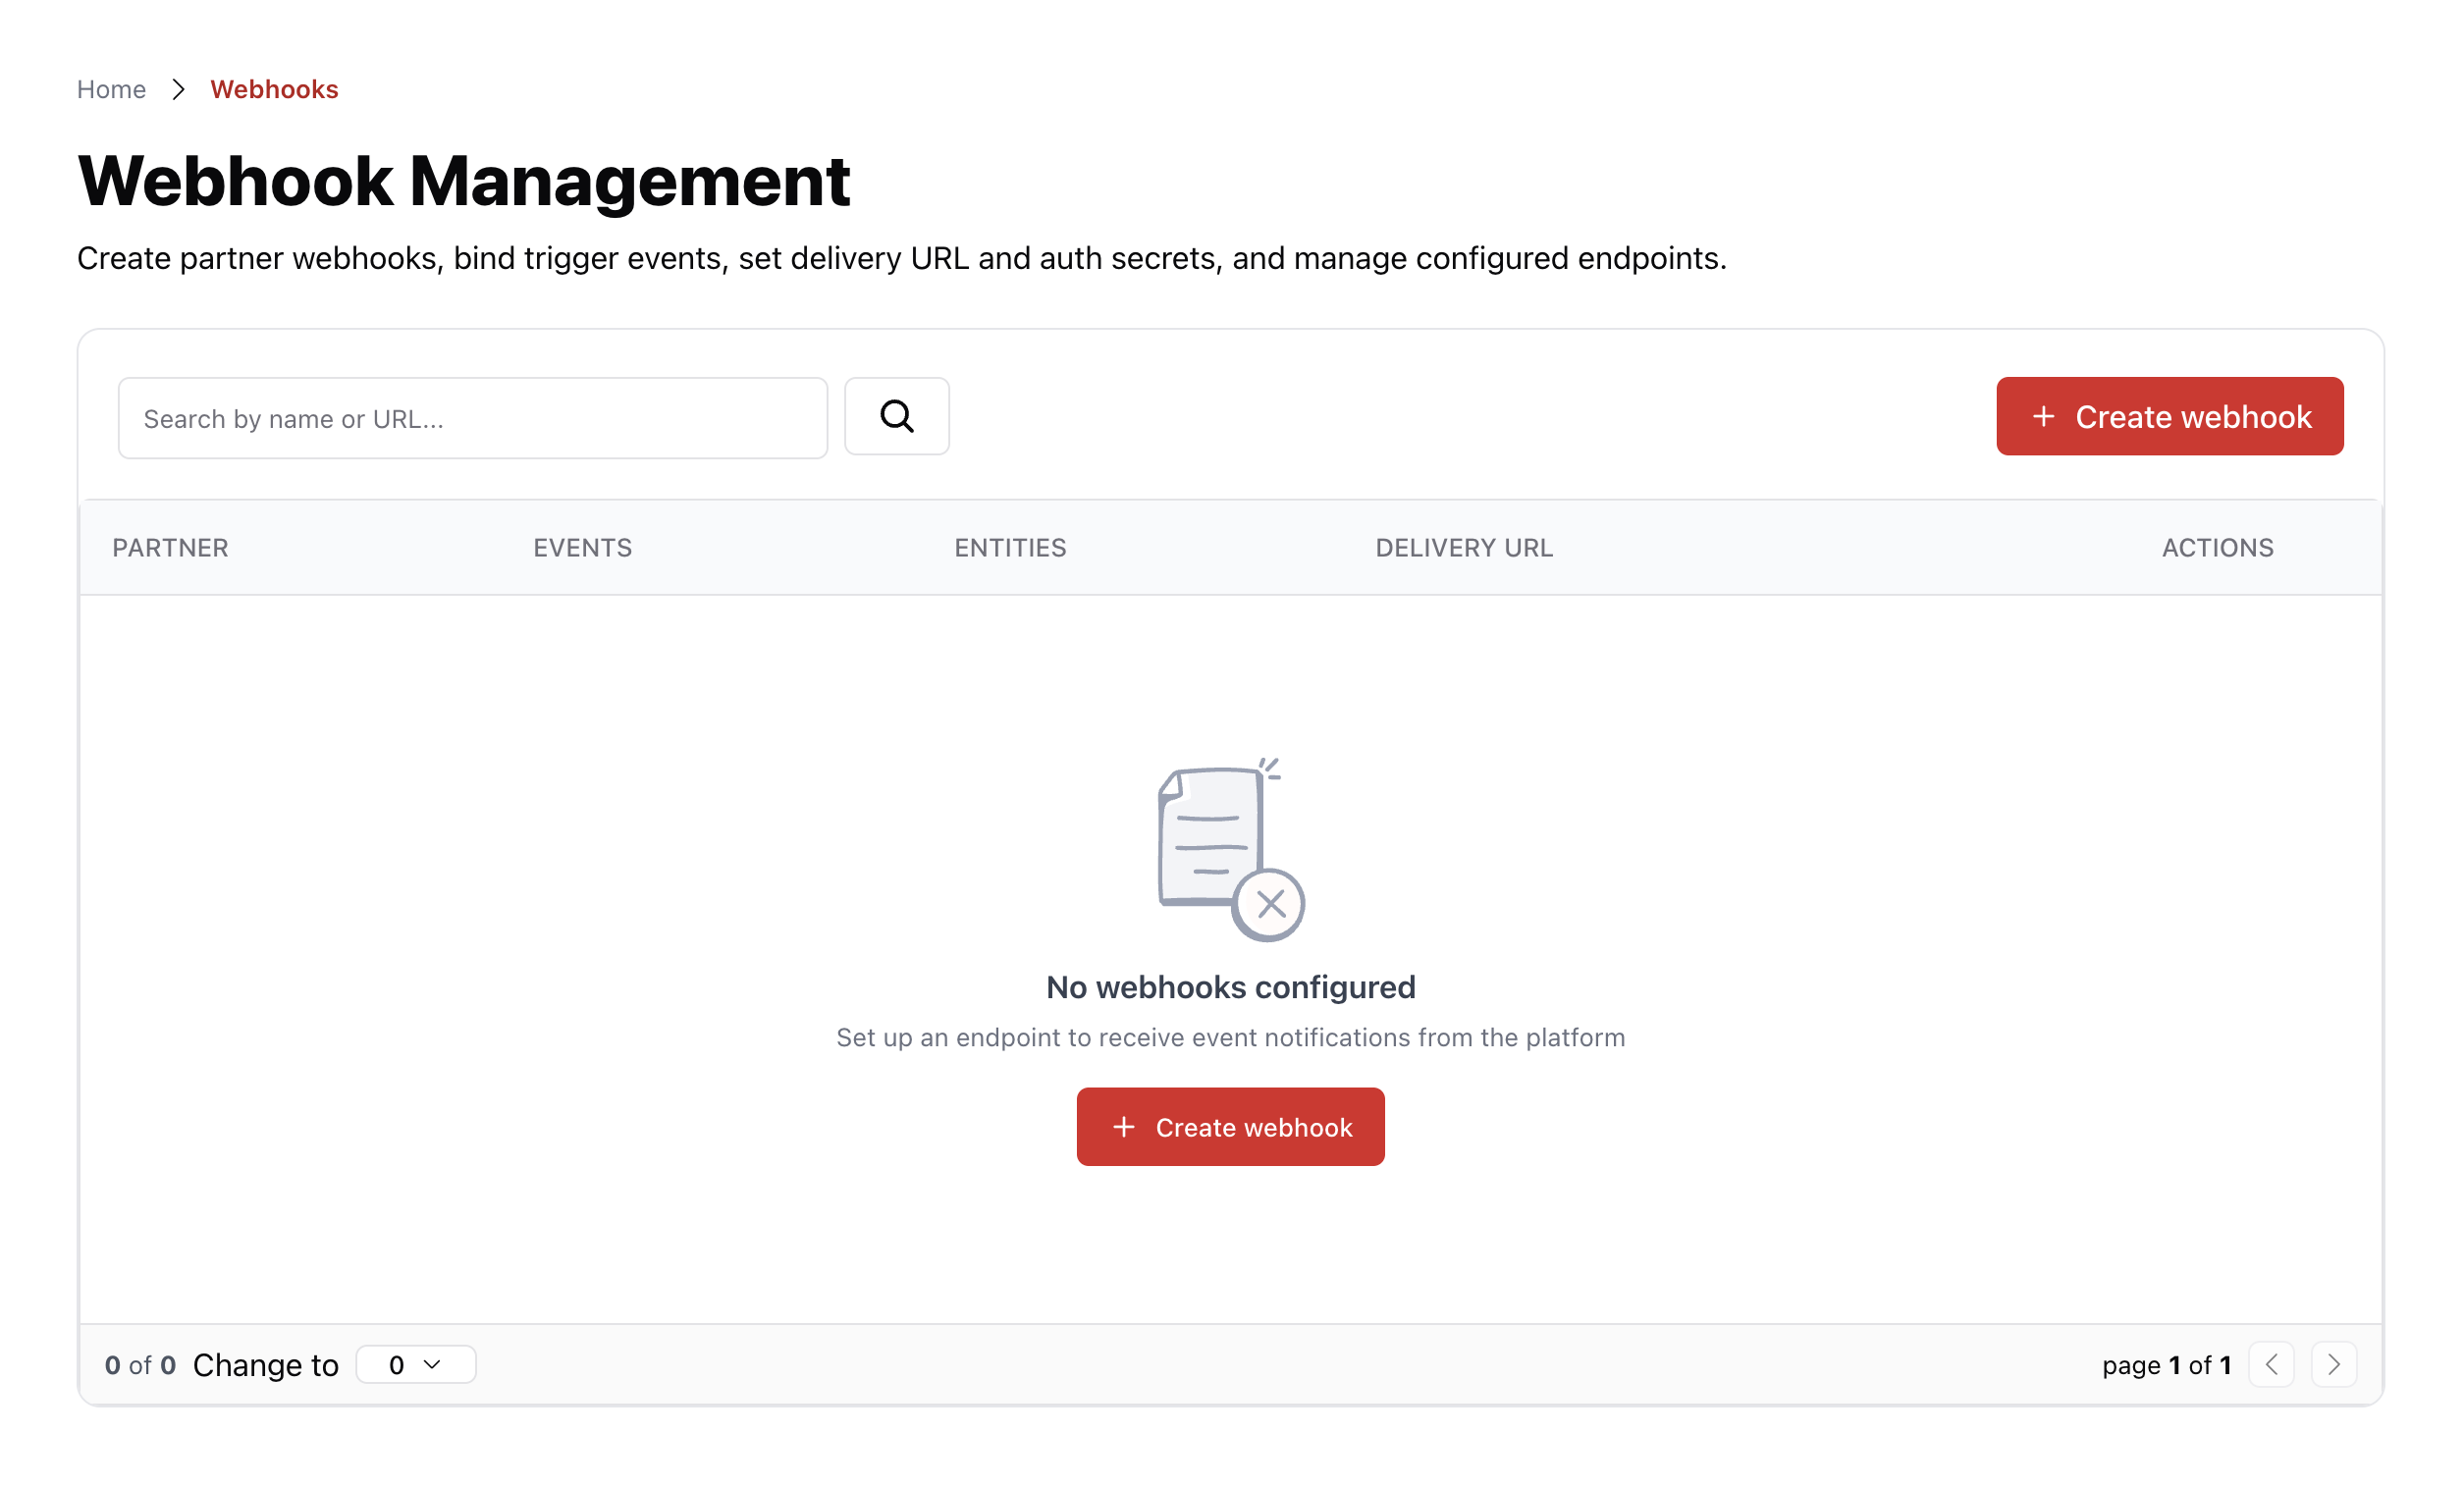
From here you can see all configured webhooks, their subscribed events, target entities, and delivery URLs.
Step 2 — Create a Webhook
Click the + Create webhook button in the top-right corner. A wizard will guide you through 4 steps.
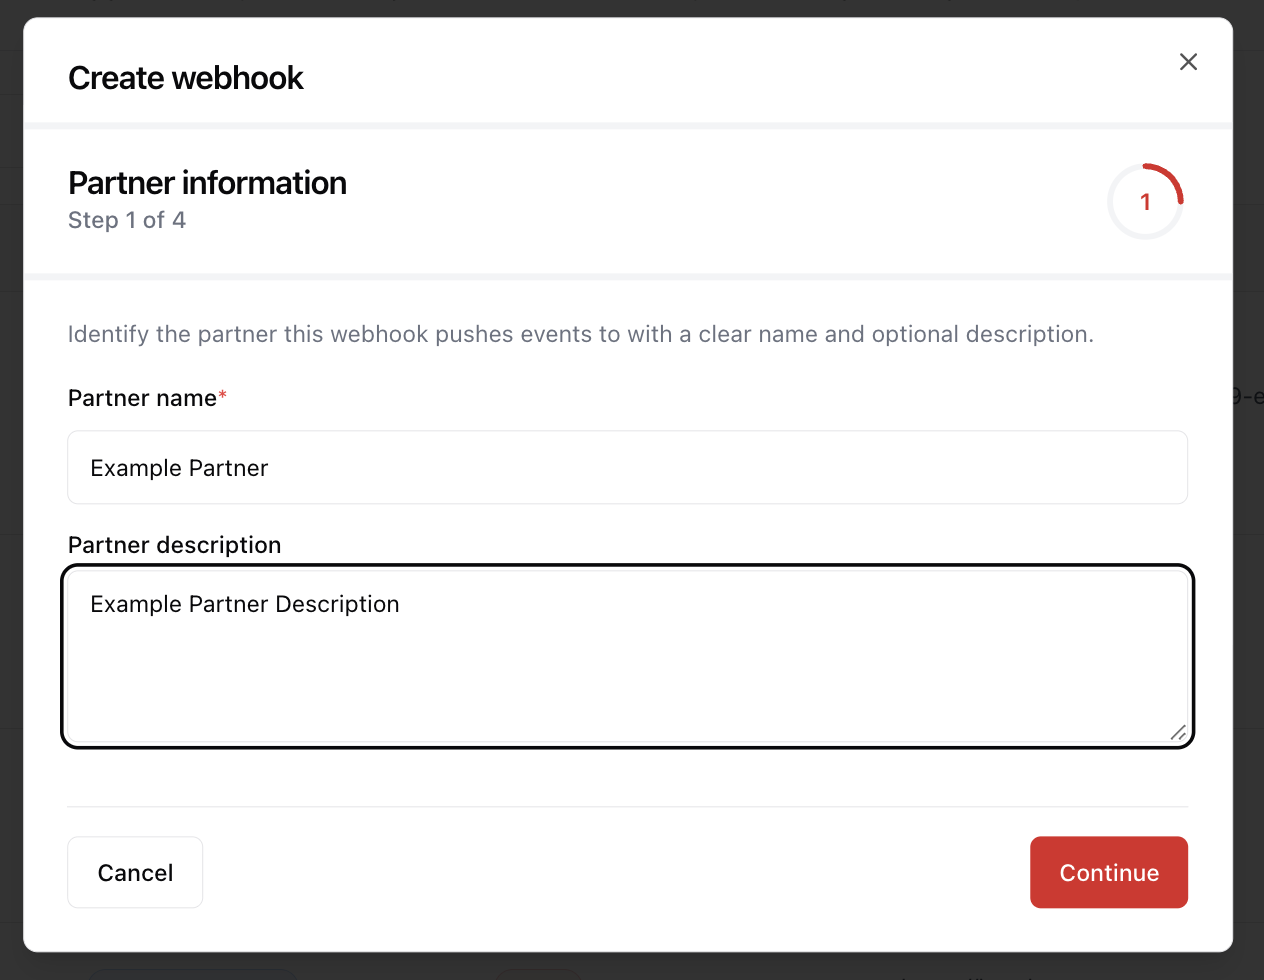
Step 2.1 — Partner Information
Enter your Partner name (required) and an optional description to identify this webhook.
Step 2.2 — Select Events
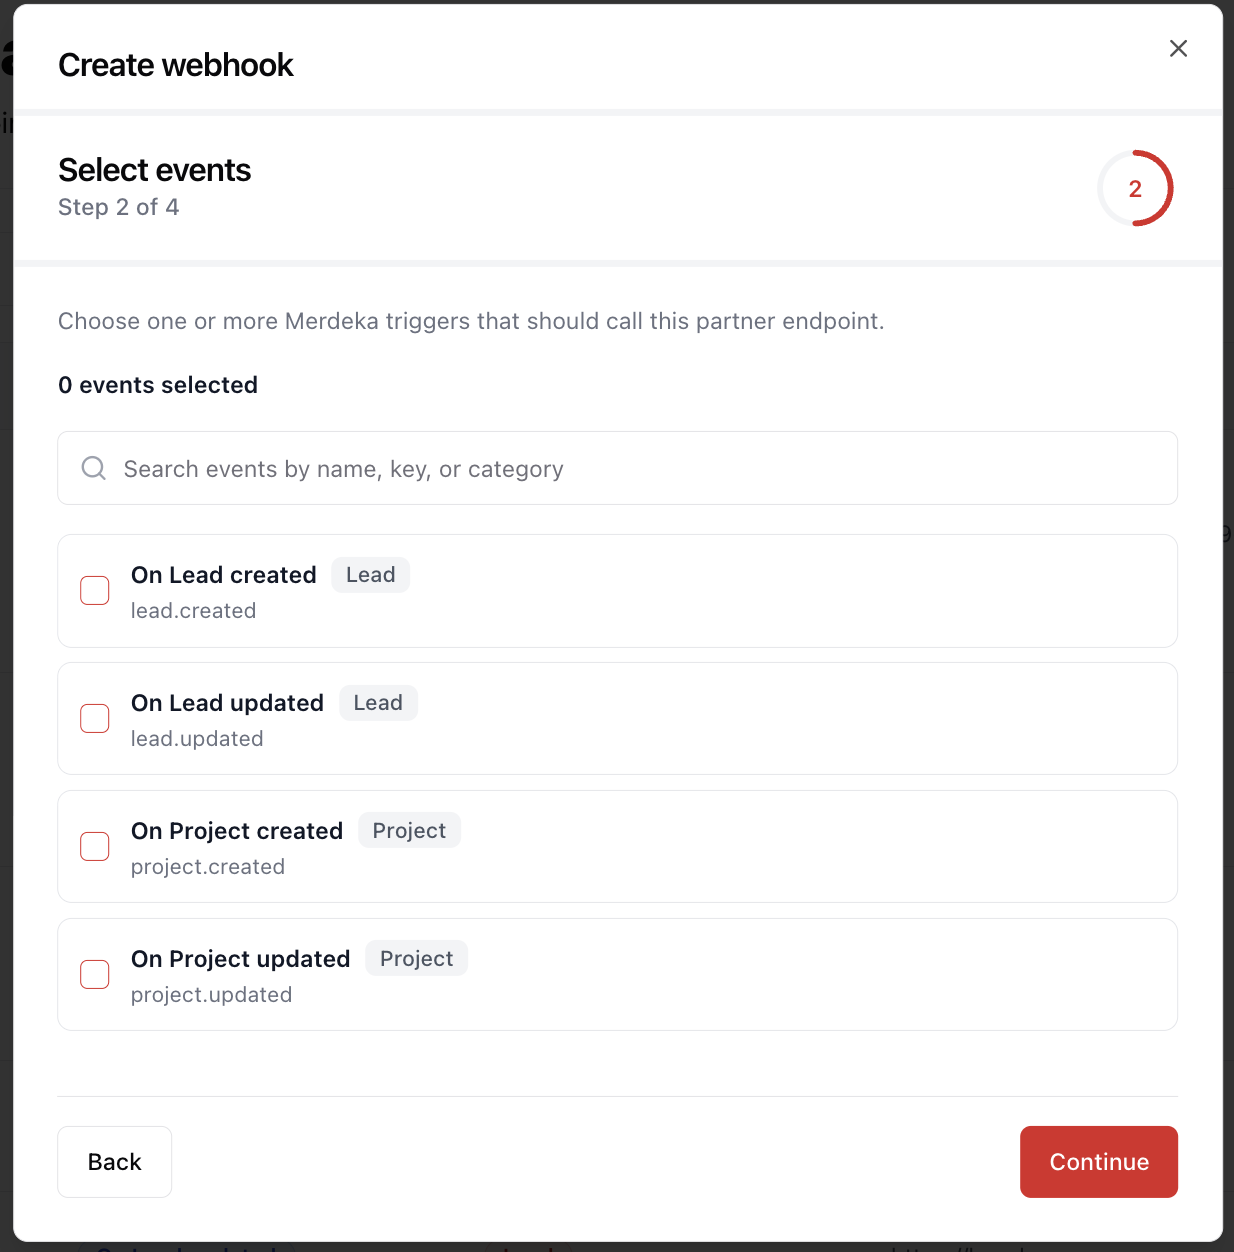
Choose one or more events that should trigger this webhook. Available events:
| Event | Key | Description |
|---|---|---|
| On Lead created | lead.created | Fires when a new lead is created |
| On Lead updated | lead.updated | Fires when an existing lead is updated |
| On Project created | project.created | Fires when a new project is created |
| On Project updated | project.updated | Fires when an existing project is updated |
You must select at least one event.
Step 2.3 — Data Filters
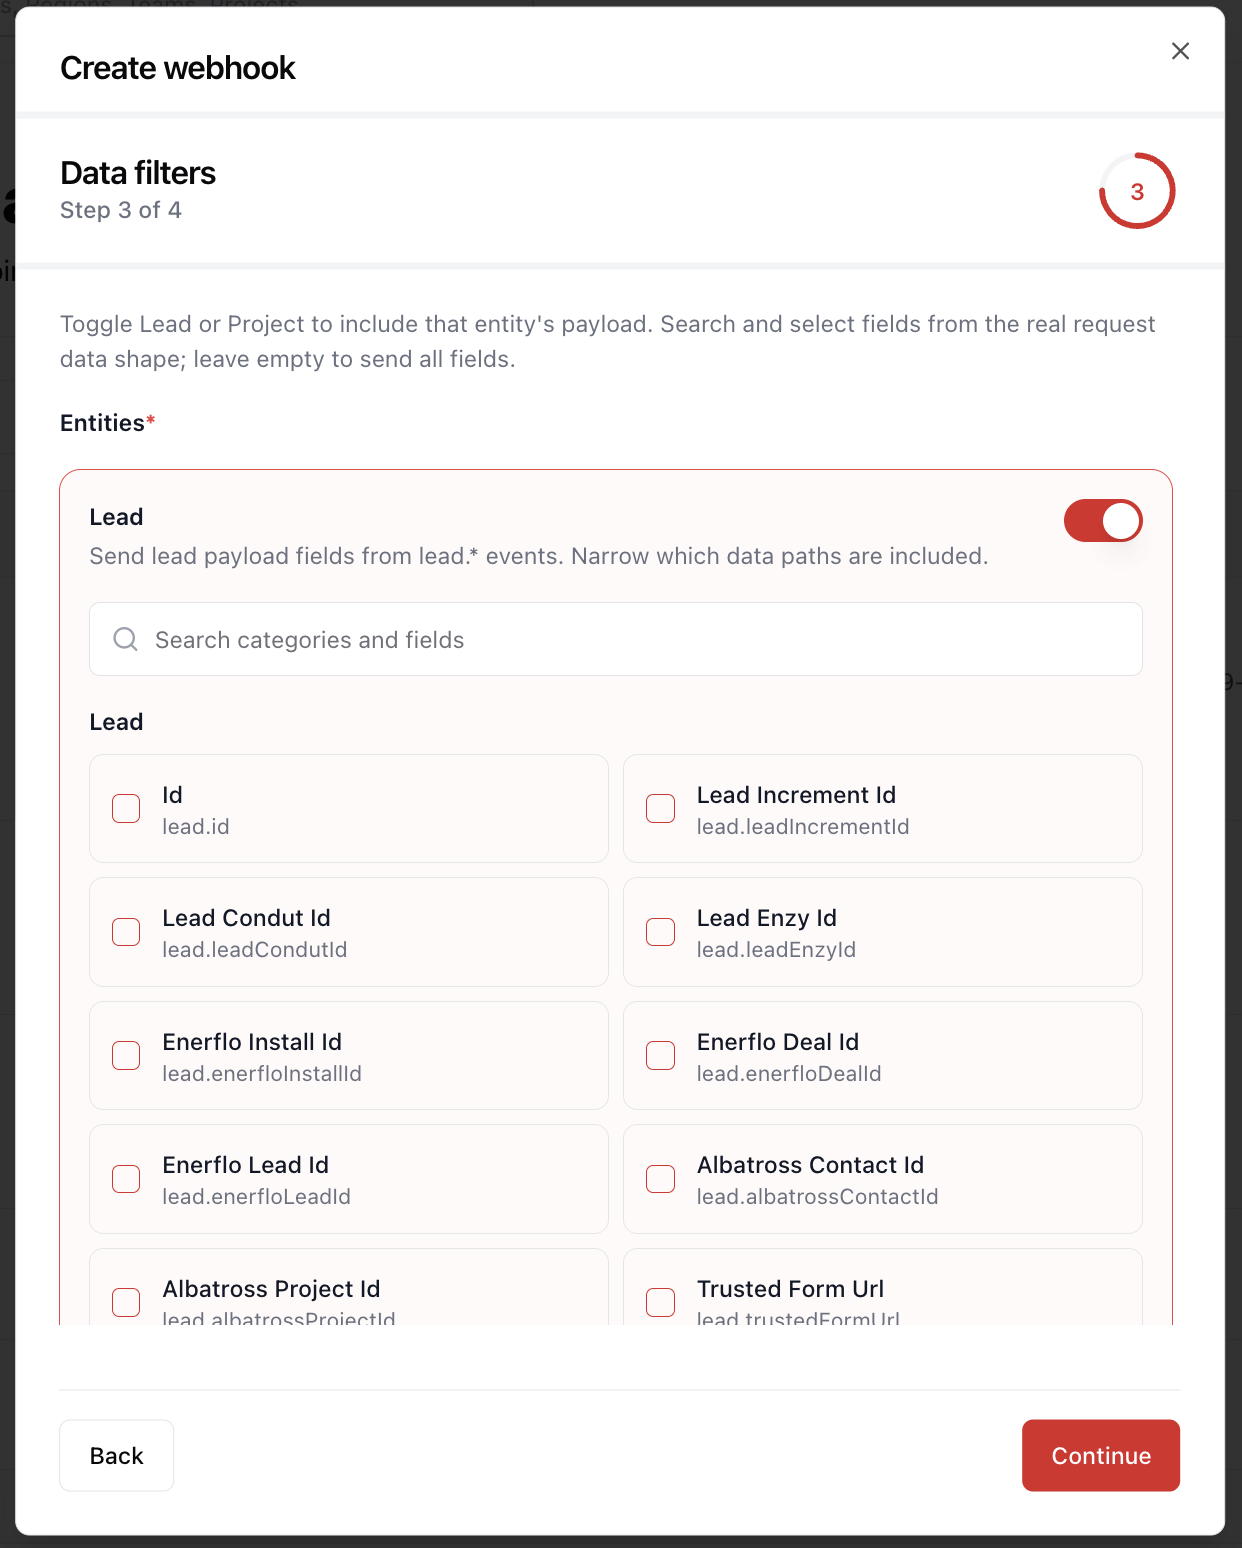
Choose which entity data to include in the webhook payload. You can toggle Lead and/or Project entities depending on which events you selected.
For each entity, you can either:
- Leave empty — sends all available fields
- Select specific fields — only the selected fields will be included in the payload
This is useful if you only need certain data points (e.g., just the lead ID and contact info) rather than the full payload.
Step 2.4 — Endpoint & Payload
Configure where and how Merdeka delivers the webhook:
- Webhook URL (required) — your HTTPS endpoint that will receive POST requests
- Headers (required) — the header name used for authentication (e.g.,
X-Enzy-Auth) - Secret value (required) — the secret sent in the header so you can verify the request came from Merdeka
- Custom body (optional) — a JSON template to customize the payload structure. The base shape uses runtime
webhookDataplus optionalmeta:
{
  "data": {
    "...webhookData": {},
    "meta": {
      "...customData": "any custom data if exists"
    }
  }
}
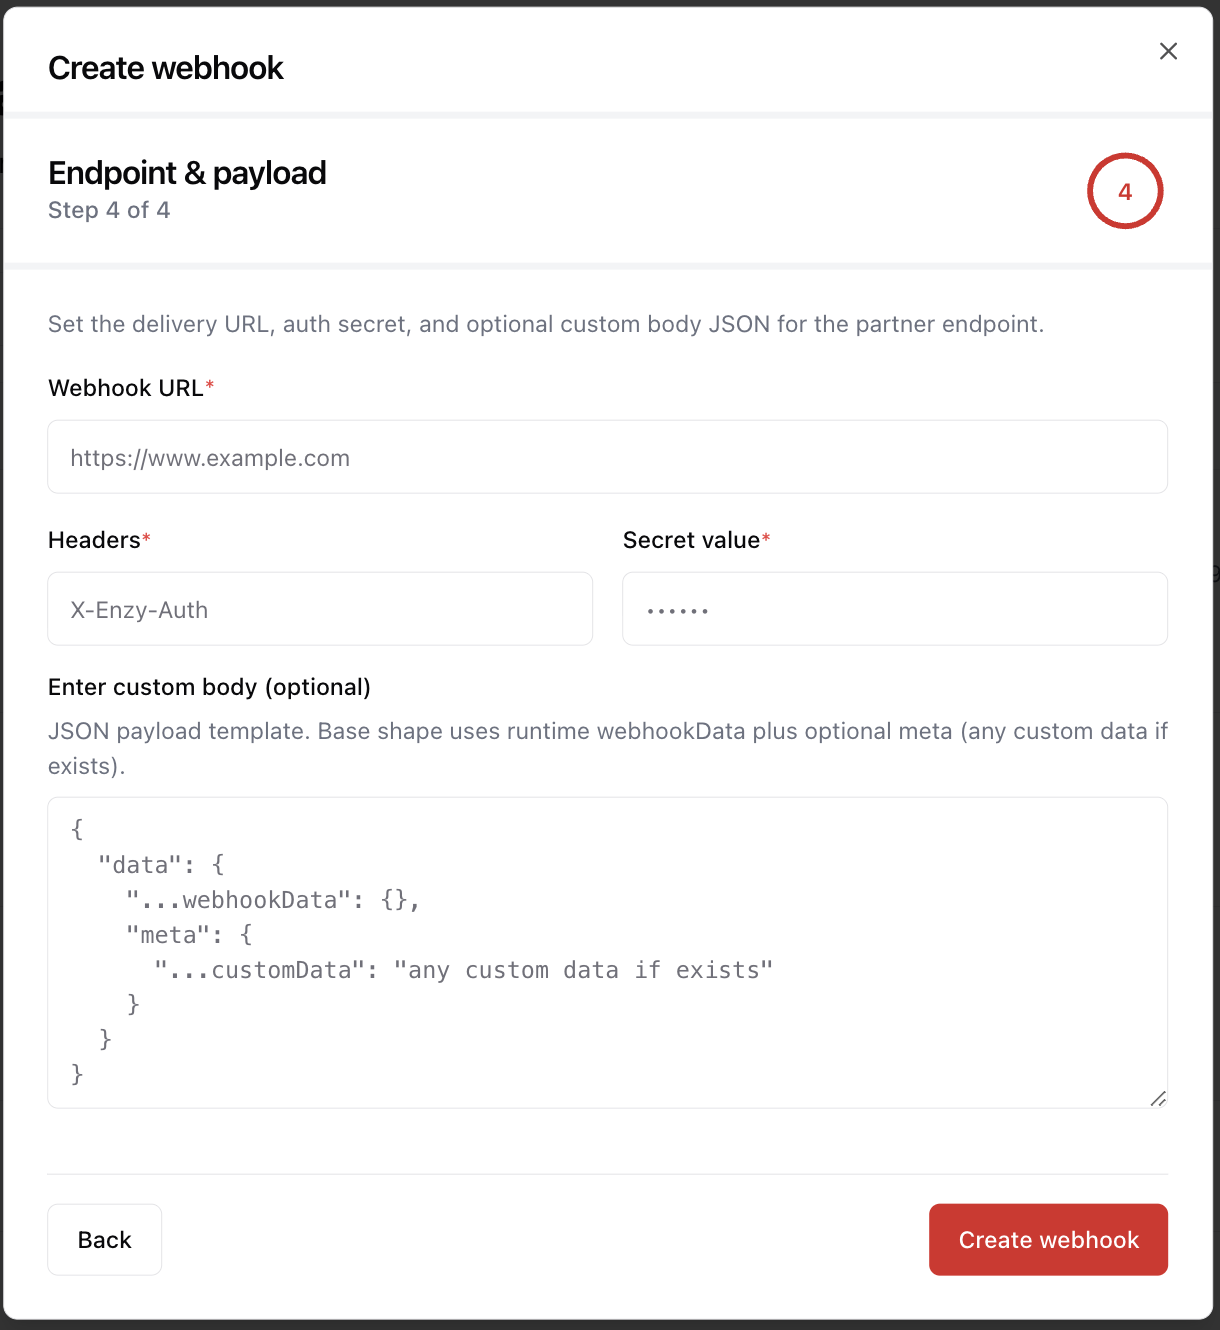
Click Create webhook to finish. Your webhook is now active and will start delivering events to your endpoint.
Step 3 — Monitor Delivery Logs
After creating a webhook, click the view (eye icon) button on any webhook row to access its Delivery Log page.
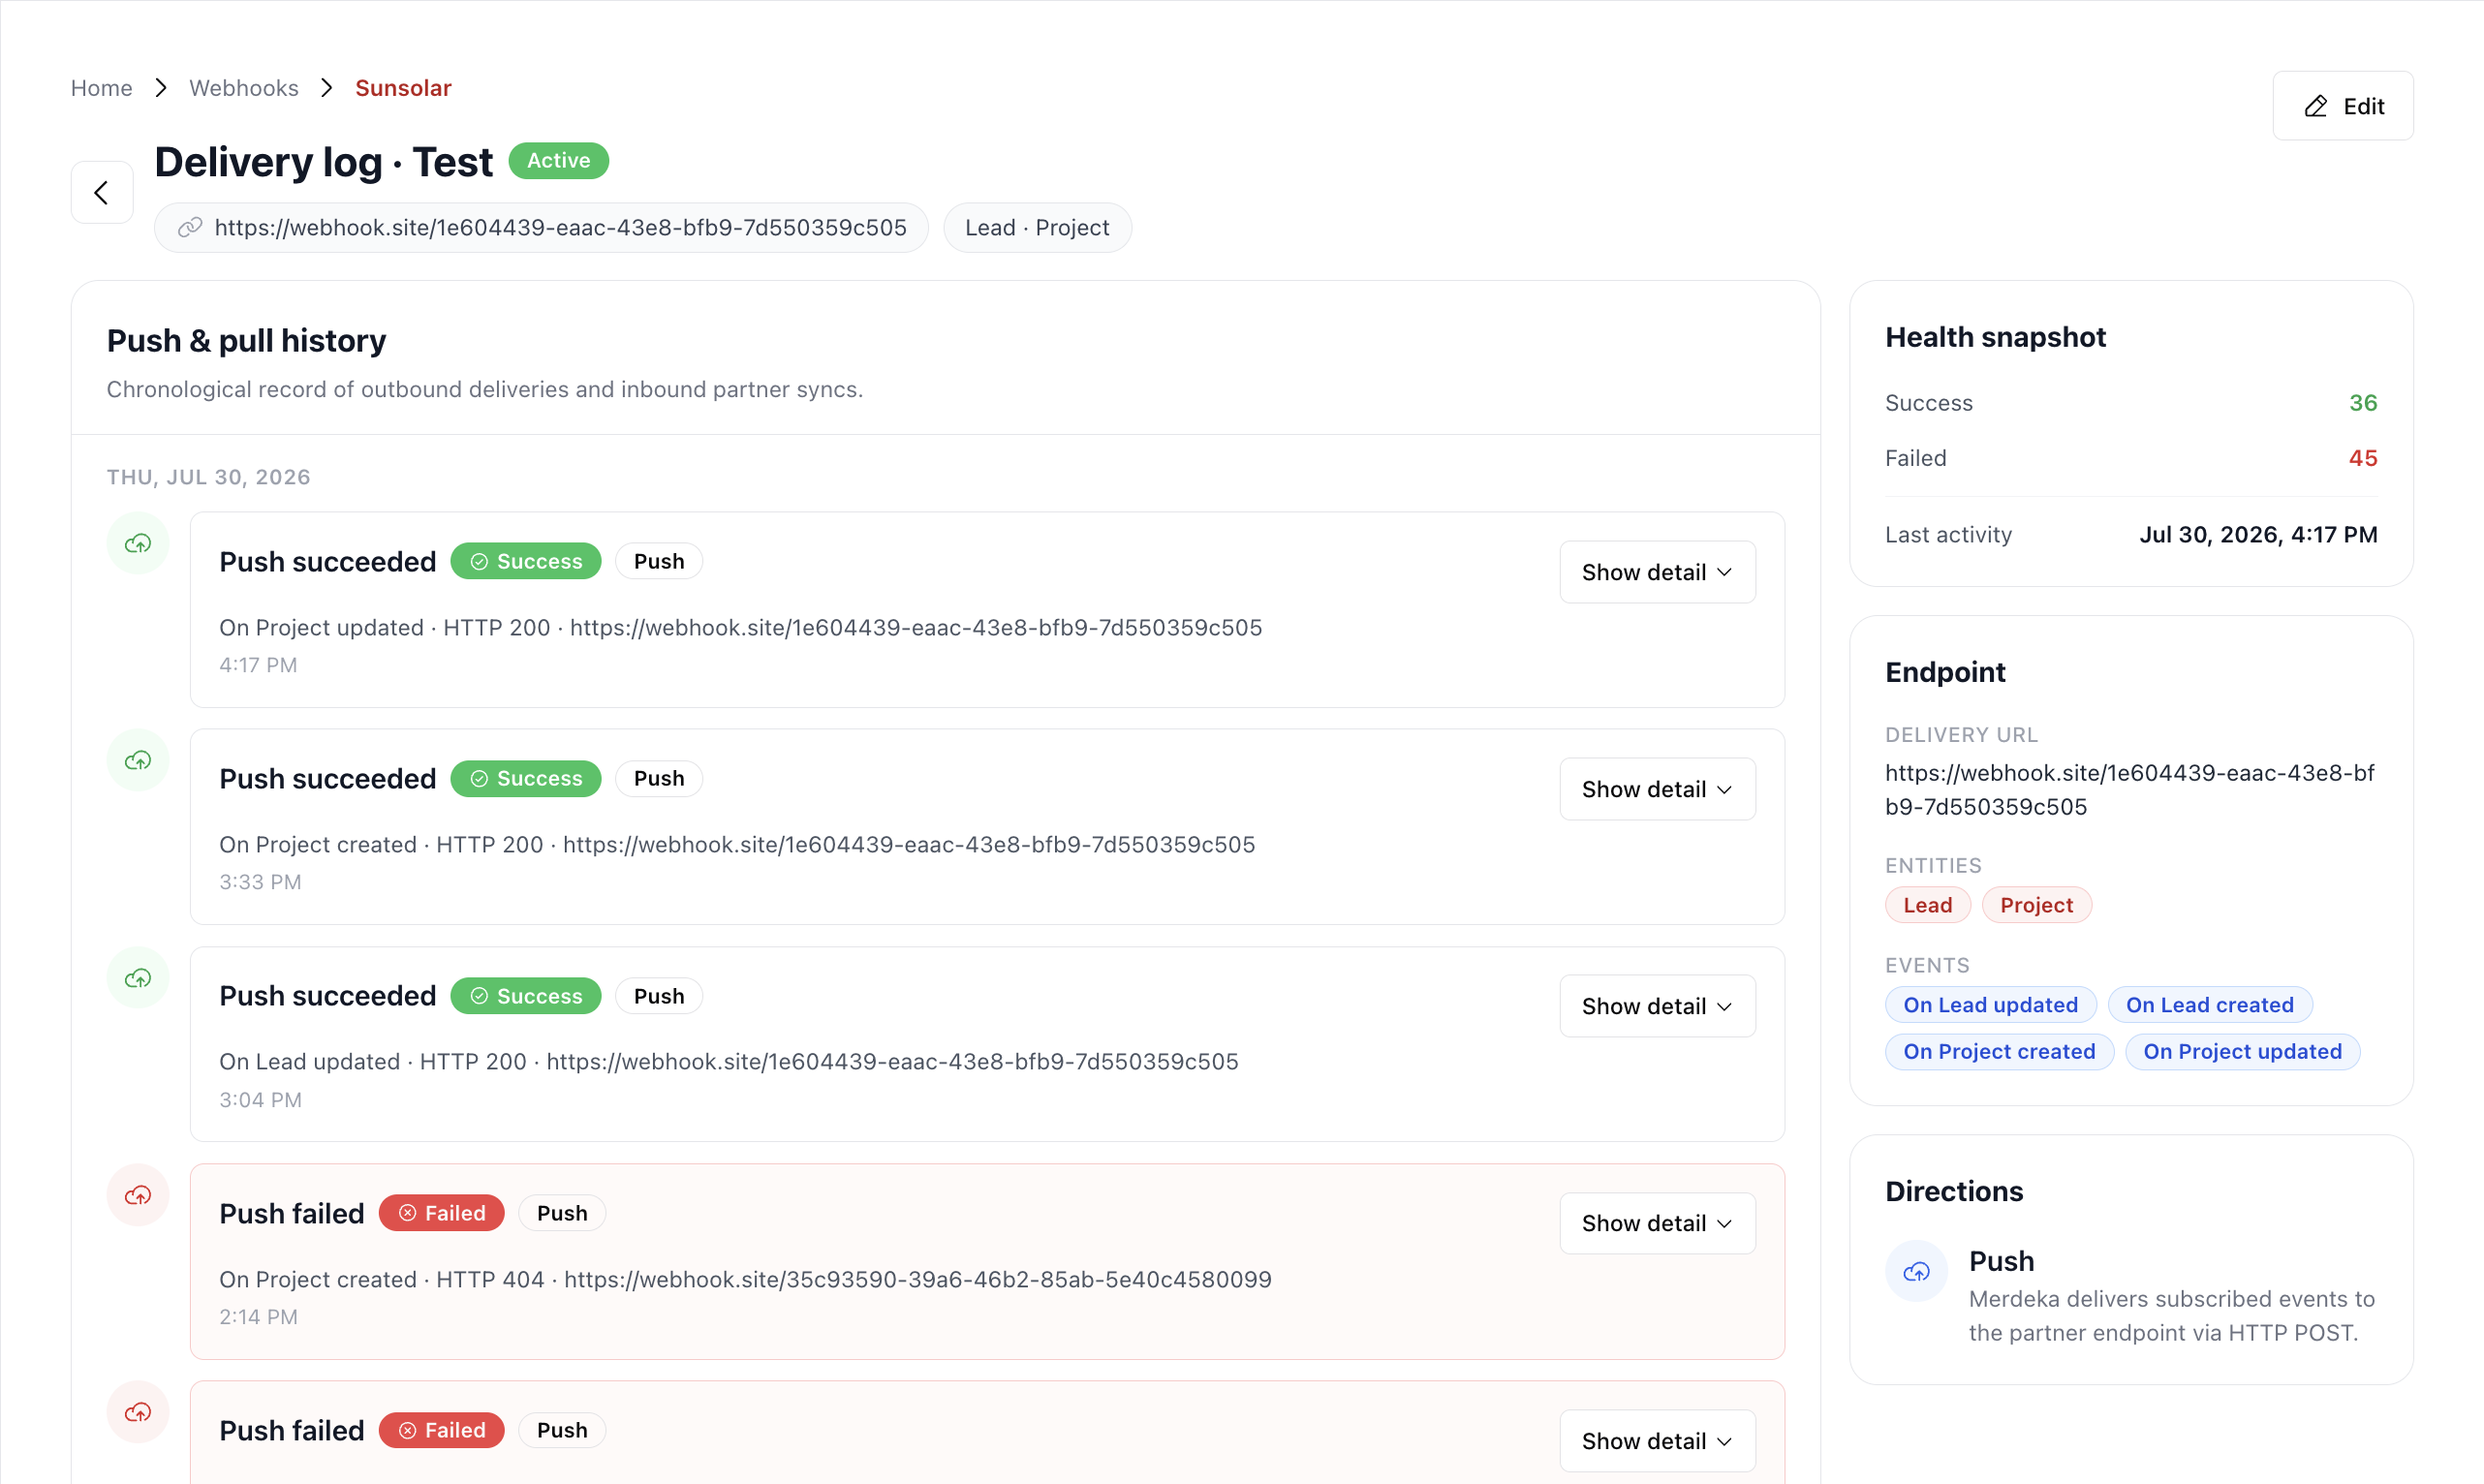
The delivery log page shows:
- Health Snapshot — total success/failed count and last activity timestamp
- Endpoint Info — delivery URL, subscribed entities, and events
- Push & Pull History — chronological list of all delivery attempts
Viewing Delivery Details
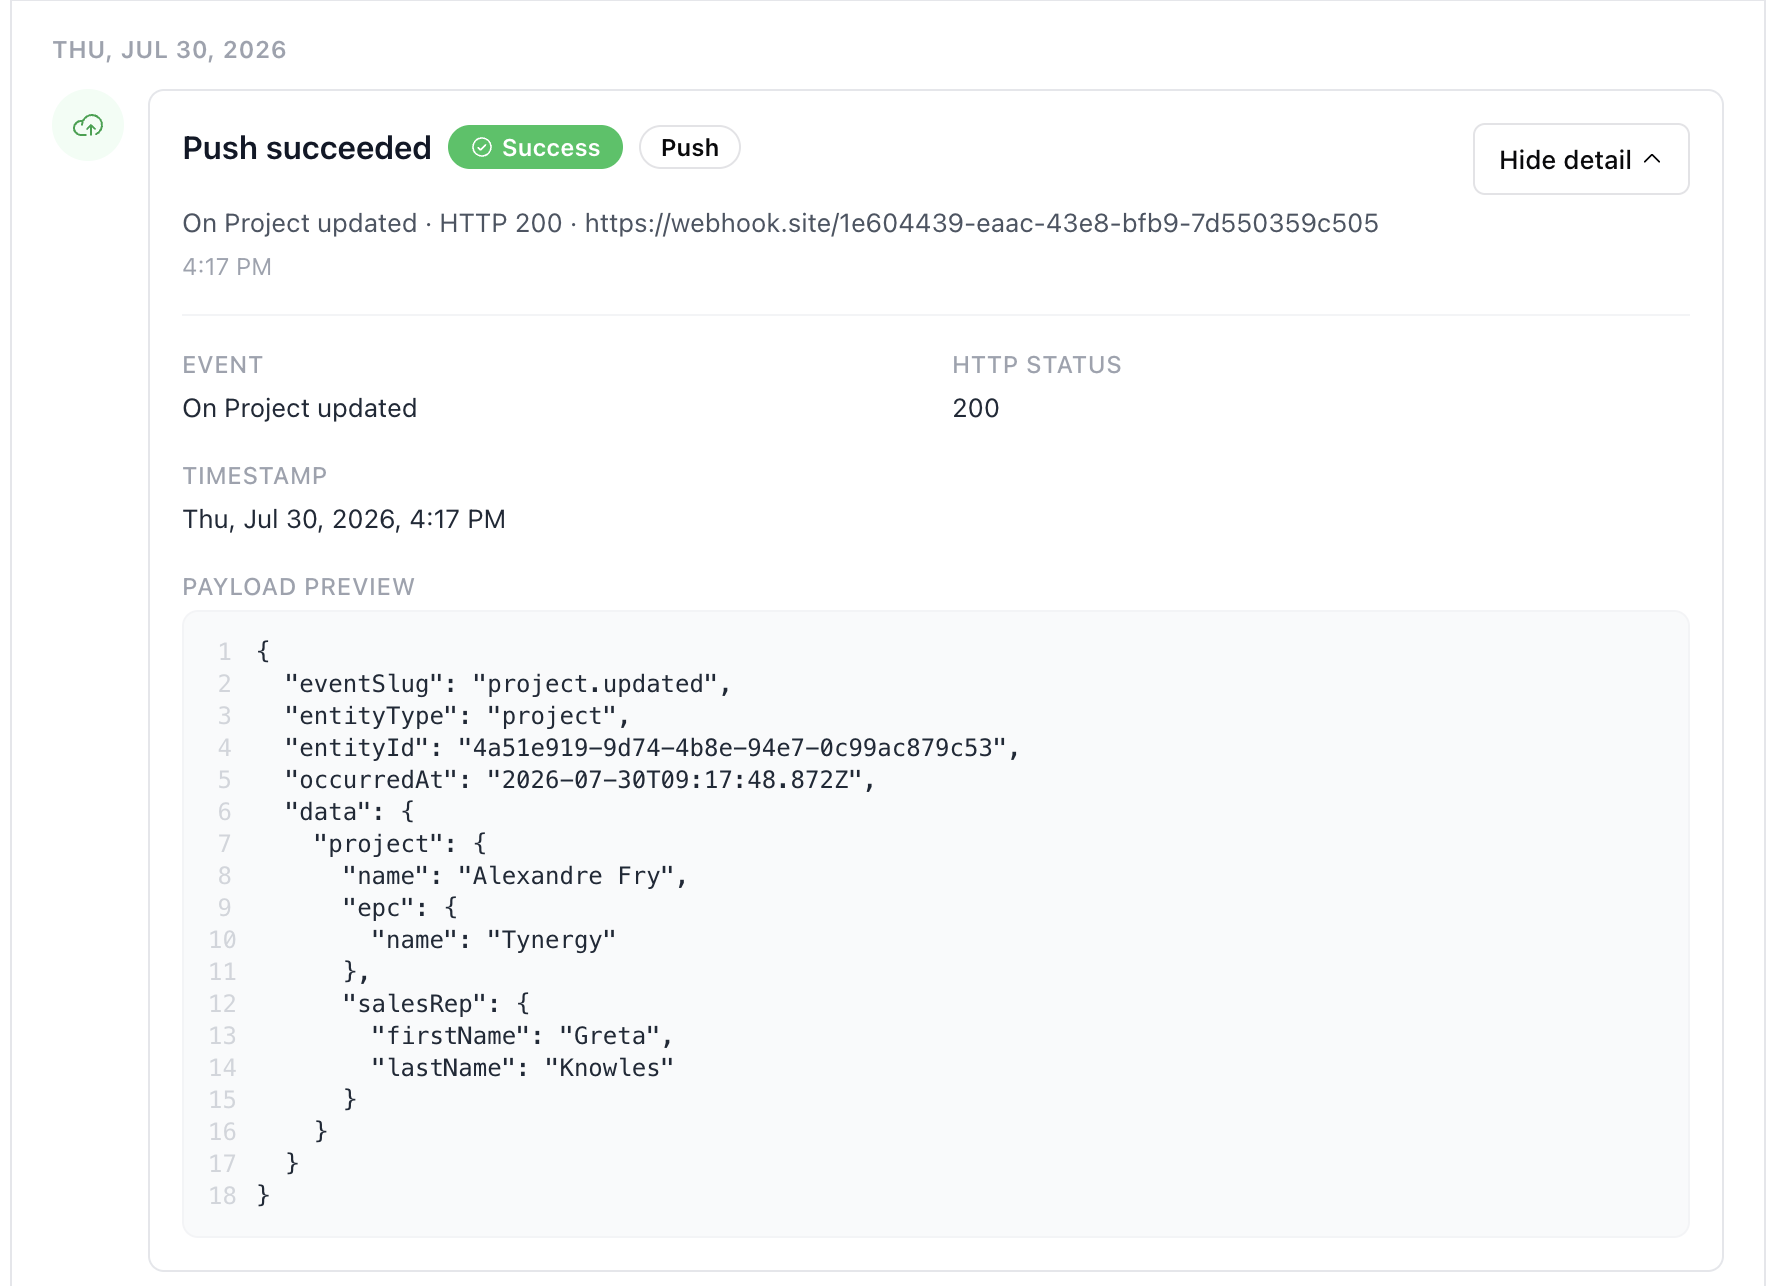
Click Show detail on any delivery entry to see:
- Event — which event triggered the delivery (e.g., "On Project updated")
- HTTP Status — the response status code from your endpoint
- Timestamp — when the delivery occurred
- Payload Preview — the exact JSON that was sent to your endpoint
Successful delivery:
Failed delivery:
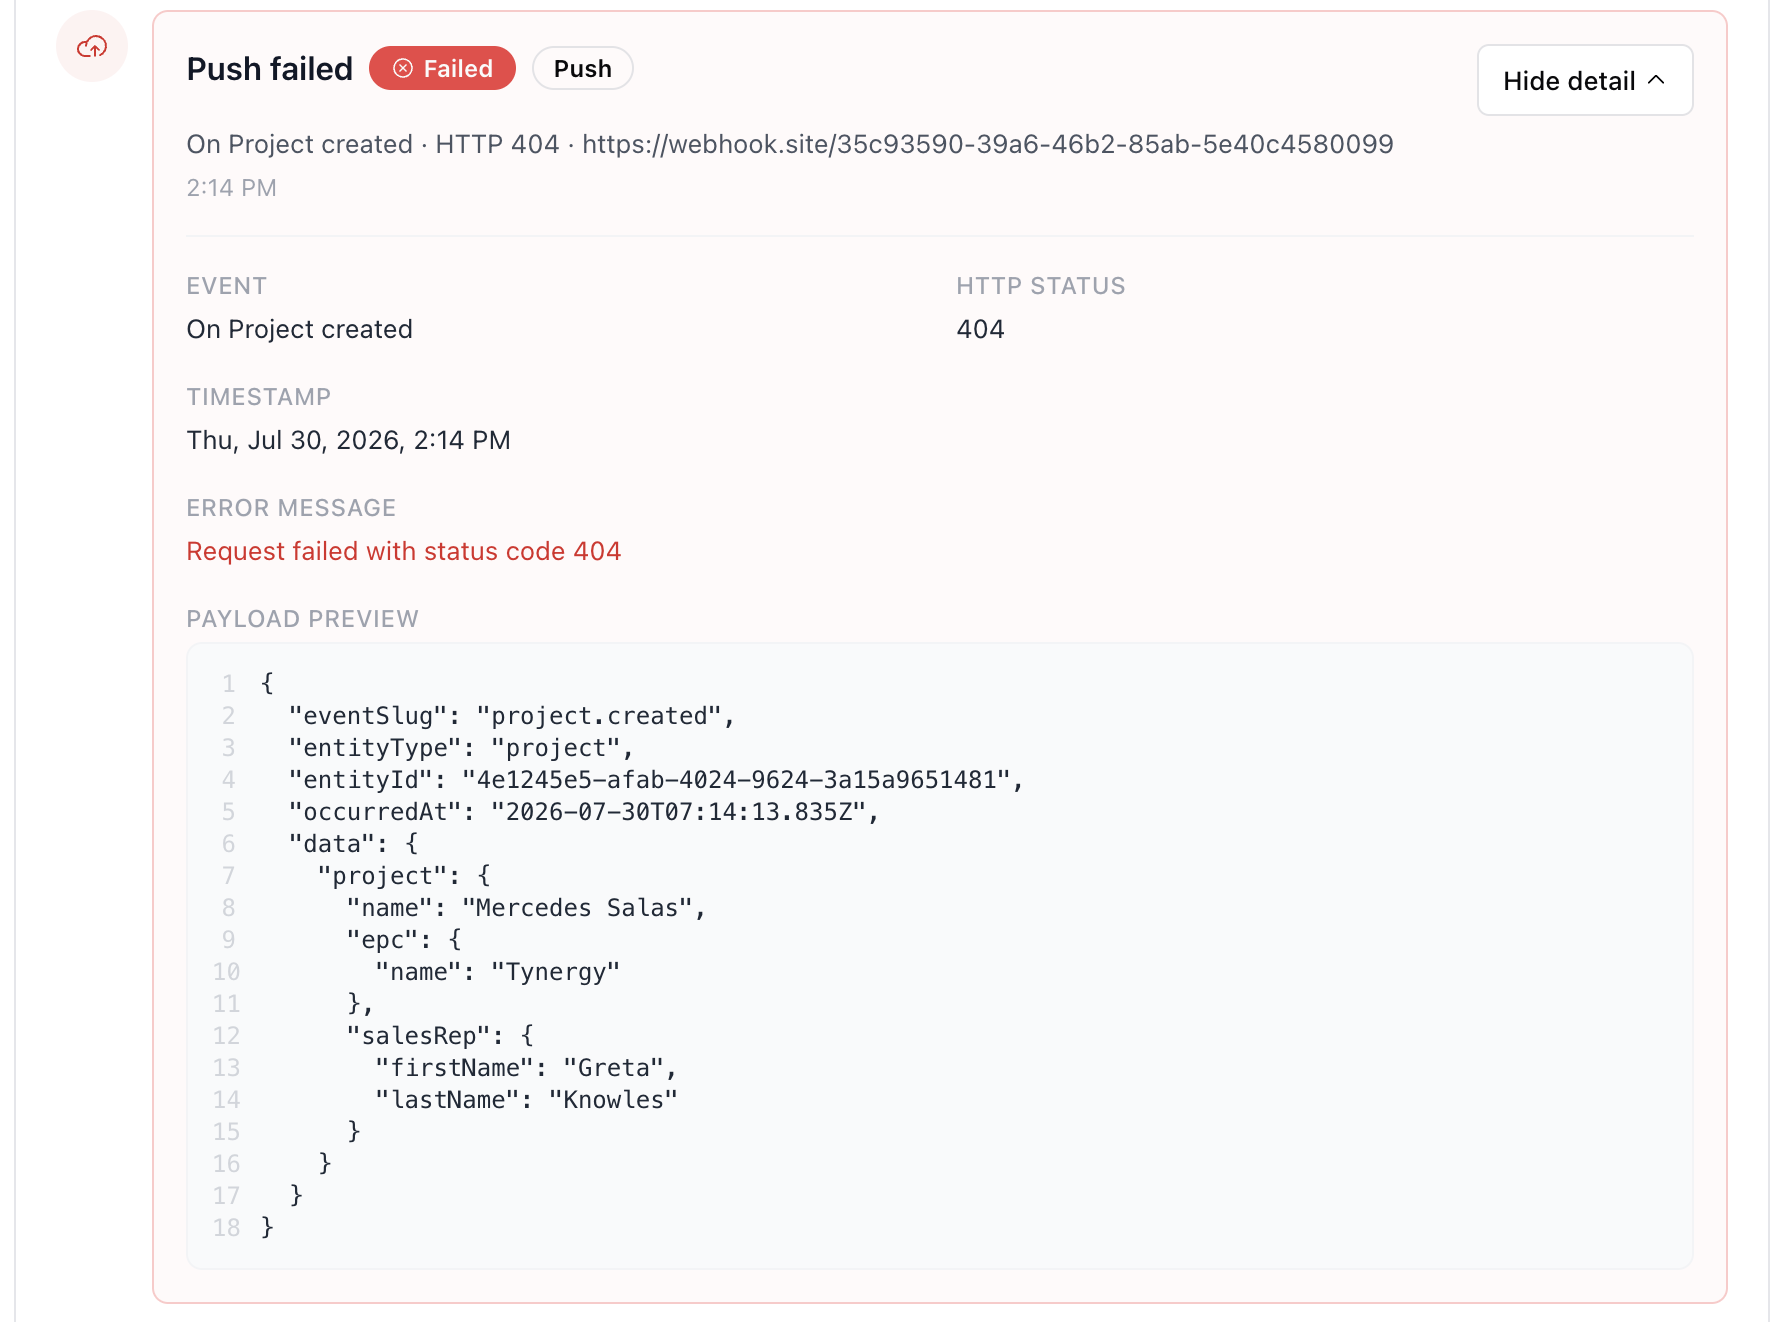
If a delivery fails, you'll see the Error message (e.g., "Request failed with status code 404"). Check that your endpoint URL is correct and responding with a 2xx status code.
Managing Webhooks
From the Webhook Management page, each webhook row has action buttons on the right side.
Editing a Webhook
Click the pencil icon on any webhook row to open the edit wizard. You can update:
- Partner name and description
- Subscribed events — add or remove events (e.g., switch from
lead.createdonly to all lead events) - Data filters — change which fields are included in the payload
- Endpoint URL — point deliveries to a different URL
- Header name and secret — rotate your authentication secret
- Custom body — modify the meta template
The edit wizard uses the same 4-step flow as creation. After saving, changes take effect immediately on the next event delivery.
Deleting a Webhook
Click the trash icon on any webhook row. A confirmation dialog will appear — once confirmed, the webhook is permanently removed and no further deliveries will be sent to that endpoint.
Deletion is irreversible. If you want to temporarily stop receiving events without losing your configuration, you can update the webhook endpoint to a placeholder URL, or use the Activate/Deactivate API endpoint programmatically.
Tips
- Always return a
200 OKfrom your endpoint as quickly as possible. Process the data asynchronously if needed. - Verify the secret in the request header to ensure the webhook came from Merdeka.
- Monitor delivery logs regularly to catch and resolve failed deliveries early.